Today we’re taking a look inside the two most popular continuous glucose monitors, or CGMs: The Abbott FreeStyle Libre 3 and the Dexcom 7.
Originally developed for diabetes blood sugar monitoring, CGMs are gaining wider appeal among nondiabetics looking to track their metabolic health. It feels pretty cyborg to wear a biosensor that streams data to my phone over Bluetooth.
Welcome to another teardown! This time we’re taking a look at the CurrentBody LED red light therapy mask. Masks like these promise to improve various signs of skin aging.
This project was a collaboration across three continents: my friend Michelle from Lab Muffin Beauty Science in Australia, my other friend Ruth Amos in the UK, and myself (in NYC). We were very curious about these devices. How do they work? What’s the science backing up the marketing claims? Is it really worth the $400 price tag? Could we make a DIY version? We all got on the horn to talk about it.
Today we’re looking inside the Relief Band 50 hours, a motion sickness wearable. It works by stimulating the nerve in your wrist that has been found to relieve motion sickness. You may have heard of or seen the compression-style wristbands before, but this takes it up a notch by using electricity to stimulate the nerve using two electrodes that you’re supposed to place on the inside of your wrist and turn it up until you can feel the buzz up through your first fingers. The single button on the device increases the power level when pressed, or turns the device off if you hold it down.
This “50 hours” version is great for keeping in the car in case I forget to take my Dramamine. I find the electrical stimulation a little annoying, so I don’t think I would want to rely on it for the whole car ride or whatever else is making me motion sick, but it definitely works and is great for the 20 minutes it takes the Dramamine to kick in. Because if you get motion sickness, you know that once you’re queasy, nothing can make that feeling go away until you stop moving.
So because it’s so useful to me, the relief band joins the club of devices I’ve taken apart that I like so much, that I bought another one for my personal use. And this isn’t sponsored by them, but they sell some of their models on Amazon so if you use my affiliate link, I’ll get a portion of the sale at no additional cost to you.
To take this gadget apart, I used leverage to pop the two halves of the enclosure apart. As I suspected, it is possible to replace the coincell batteries inside when they die, then snap the enclosure back together. But I get it, they wanted to offer a more affordable SKU than their rechargeable models, some of which also have a screen.
I’m going to show you how to reuse these batteries, diverting valuable and hazardous substances from landfill while acquiring free batteries for your microcontroller projects.
The Shift to Single-Use Vape Devices
It’s ridiculous… How do vape companies get away with putting perfectly good rechargeable lithium batteries in a single-use device? And why does it seem like there are so many more of these around all of a sudden?
I think the shift has something to do with the Juul ban. Juul had a significant share of the market with its rechargeable, cartridge refillable device. When it was pulled from the US market in 2022 by the FDA, new competitors popped up to fill the demand, in a market where now brand recognition could mean a target on your back from regulators. So they’re not incentivized to make a refillable system. And selling you a completely new device every time the old one wears out is more profitable than selling you just a cartridge. Unless lithium becomes much more scarce, or it becomes a legal requirement to make them infinitely refillable, I don’t see this trend changing anytime soon, unfortunately.
I did find some brands that do have a charging circuit included, to make use of a larger liquid reservoir. But once the liquid runs out, the device is still intended to be thrown out.
How did I get this many devices to take apart? Besides picking them up off the sidewalk, I asked my local Buy Nothing group and found a few willing folks who knew better than to throw these in the trash and were happy to offload their hoard.
Lithium Battery Overview
Lithium batteries are used in many everyday devices like laptops, cell phones, hybrids and electric cars. They are much lighter than traditional alkaline batteries and can last much longer. They can also be recharged multiple times. So it’s no wonder that they’re in everything nowadays.
Lithium batteries contain layers of materials folded up together into a small shape. Energy is stored on either side of a battery “stack” and it wants to get from one side to the other, and we power our circuits by making the charges do work for us along the way. As the battery discharges and produces an electric current, lithium ions are released by the anode to the cathode, causing a flow of electrons from one end to the other. When charging, the opposite happens: the cathode releases lithium ions, which are then obtained by the anode. You can think of the act of charging like pushing the energy back to the other side so that it can be ready to go again. And if the layers are breached by, say, a puncture or by crushing, the battery can become shorted out, and the electrons get way too excited.
The C rate is the measure of how quickly the battery can be discharged and recharged without damaging it. Failure modes include overcharging, over-discharging, and short-circuiting. Always use a charging rate appropriate for the battery’s C rating, or a conservative guess.
Here’s a list of do’s and don’ts when using LiPo batteries:
Do…
Charge your battery slowly and evenly, at a rate appropriate for its capacity.
Store your battery in a cool place
Get a fireproof battery bag to keep your batteries in
Don’t…
Don’t charge or discharge your battery too quickly or let it get too hot
Don’t leave your battery unattended while charging
Don’t discharge your battery below its minimum voltage level
Taking Apart the Devices
Taking apart anything with a lithium battery in it is dangerous. You have to be careful not to damage the battery or short it out, or you could quickly have a concentrated fire hazard on your hands. So, don’t do this at home without the supervision of someone who knows what they are doing!
I cracked open the cases using an awl and hammer to apply force to the seams in the plastic enclosures.
Then, the whole circuit and tank assembly usually slides right out. If it doesn’t, you can reach in with pliers and pull on the plastic tank– not the battery or its wires.
I recommend wearing gloves when handling and disposing of the liquid tank, and give the battery a wipe before removing them. When I didn’t, I had a hard time getting the stink out of my fingers even after washing my hands. This whole process is pretty smelly, and I think you can absorb the ingredients through your skin too.
Here are some examples of the batteries I found inside. These 280 and 350 mAh batteries are about five dollars retail, and perfect for wearables or other portable projects.
I desoldered them from the other circuitry, and soldered the two wire connections to a new JST plug, with plenty of heat shrink tubing to insulate the connections and relieve any strain on the tiny battery wires.
Charging the Batteries
To charge these up, you can’t just connect them to power. You’ll need a charger circuit with appropriate settings for the size of the battery. The charger monitors the battery and fills it up gradually and safely.
Some have a dip switch so you can toggle the charging rate, like the one shown on the left. You should choose the fastest rate without going over the capacity of the battery. So, for example, for a 350mAh battery, I’d choose to charge at 300 mA. Others have solder pads you can bridge to set the charging rate, like that shown on the right– I chose 200 for the 280 mAh batteries.
The large-capacity devices are nice for reusing because they come with a charging circuit. It’s been interesting to see that which charging chip varies quite a bit. Some are integrated overvoltage and overcurrent protection chips, but others just put a couple of PNP transistors on there and call it a day. So depending on the quality of the included charge circuit, you may wish to use it… or lose it.
I included the information that I could track down about the charging components I found below.
The difference between these batteries and the nicer ones you might buy is the protection circuitry, or lack thereof. Lithium batteries can be damaged if they are drained or charged too much or too fast. Good hobby batteries will have a little circuit on them that cuts off the power when their voltage dips too low, and protects against shorts and dangerously high current with an overcurrent cutout, These batteries usually don’t have any of that, so you need to add that circuitry yourself or leave the battery connected to a charger that has protection circuitry built-in, and is set to the proper charging rate for your battery.
To protect against accidental shorts after the battery’s out of the enclosure, I added some tape and heatshrink to the exposed contacts. Obviously it’s not a great idea to be adding any amount of heat to these batteries, so I was very judicious.
This electrical tape isn’t the best kind, either. You should use high-temp Kapton tape, but this is better than just chucking all these bare batteries in a box together.
When the device designers put these together, they knew the current draw would never exceed that of the air sensor and heater. When reusing these batteries, thermal runaway could be a real concern– if your circuit draws more current than it is rated for (the conservative rule of thumb is the battery capacity per hour), you could start an unstoppable chain reaction inside the battery that causes it to explode. Remember the Samsung Galaxy Note 7?
So in conclusion, I encourage you to pick these devices up if you see them littered, and at least get them to proper e-waste recycling, and maybe use them to power your next solar device.
Here are a few projects that I think would be a good fit for these batteries:
Today I’m taking a look inside the Ray-Ban Stories smart glasses. They’ve got cameras, speakers, microphones, and a whole lot more crammed into these frames.
These glasses are particularly interesting because of how small and oddly shaped the electronics must be to fit entirely in the otherwise pretty normal-looking frames. Before I took them apart, I sent them off to be CT scanned by my friends at Lumafield.
Taking apart these glasses was not an easy or elegant task. The only screws I was able to remove successfully were the ones holding the arms onto the front of the frames. And even still, there were flex PCBs routed through these hinges that I broke when I tore the arms off.
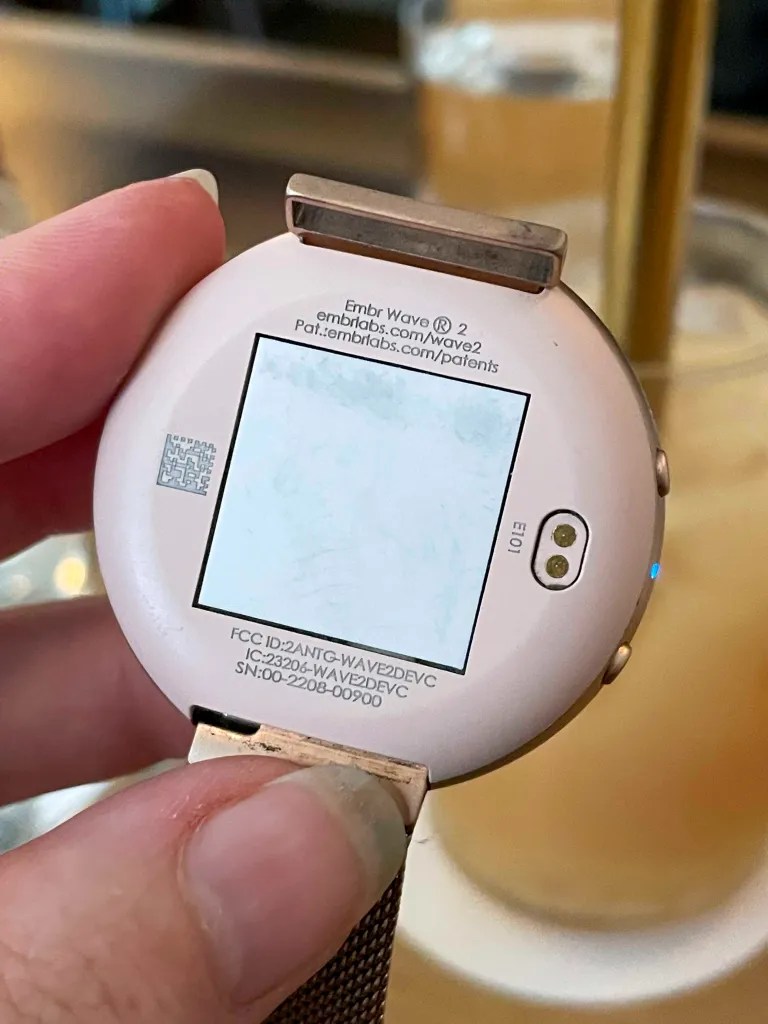
Today I’m taking a look inside the Embr Wave 2, a wristband that helps with temperature regulation. It’s the only wearable I’ve ever seen with a Peltier cooler in it. Watch the video above to see me try it out, take it apart, and analyze the design and manufacturing of the circuitry inside. Thanks to David Cranor for lending his EE expertise and to Lumafield for the 3D scan.
Welcome back for another teardown! This time I’m taking apart the Muse S meditation headband. This biofeedback wearable sends sensor data back to the app to help inform the audio experience during its meditation or sleep sessions (iOS/Android). Thanks to David Cranor for lending his EE expertise and to Lumafield for the 3D scan.
You can get supplies for your own teardowns, as well as some of the chips in the Muse, at Digi-Key, my sponsor. Check out this project on their project site Maker.io.
If you’ve been following my work for some time now, you may remember I’ve also taken apart Muse’s first headset a few years ago. The Muse S isn’t the new version of that, it’s a different product designed to be softer for sleeping. Hence the S. There is also a Muse 2 that is made of harder materials and is a more direct iteration of the Muse 1.
I’m taking a look inside the Oura ring, a fitness tracker that looks like a piece of jewelry.
Oura’s tech focuses heavily on sleep tracking, which makes sense to me since it’s way more comfortable than any wristband I’ve tried.
It’s so teeny, and waterproof, I’m super curious about what’s inside. I set out to take apart both a Gen 2 and a Gen 3 Oura ring, as well as one charging base. I anticipated having trouble getting to see the actual circuit board up close, so before cracking at them with cutting tools, I sent them off to be CT scanned at a company called Lumafield. Their Neptune machine makes it easy to see inside 3D objects and explore the different materials that make them up, in a smaller and easier to use form factor than traditional CT scanners.
Thanks to David Cranor for lending his electrical engineering expertise.
Thanks to Digi-Key for sponsoring this video! Check out this project on Maker.io.
Welcome back for another gadget teardown. This time we’re taking a look at the Amazon Halo Band, a fitness tracker that also provides tone of voice analysis. I teamed up with David Cranor and Vanessa Hill/Braincraft on this one! I also have txyz.info on Hackaday.io to thank for all the reverse engineering in their own, more thorough teardown.
Welcome to the new teardown series on my channel, where I take apart gadgets and share what I find inside. First up is the Pavlok, a shocking wearable designed to help you break bad habits.
The Pavlok comes with the main device itself, as well as two silicone wristbands.
The Pavlok pairs over bluetooth with your phone to control the settings through an app, which is also designed to keep you motivated to use the device in the most effective way possible. You can deliver an electric shock to yourself via the app or by pressing the top of the device. It also can supposedly detect when you move your hand to your mouth, say during smoking or nail biting, which are two of the habits its designed to help break.
To take it apart, I started cutting the plastic around the little metal nubs. The tricky thing about taking this thing apart, at least before the battery’s died, is that it is easy to shock yourself while holding it in place. It’s so small that one of the only flat surfaces by which to grip it is also the activation button. So I had to use the phone to make sure it was on a low setting, and try to avoid pinching it while cracking open the plastic.
The electrodes are also the case, which makes for a straightforward three-piece case. I was also able to put it back together again, which is a rare occurrence in one of my teardowns.
My friend David Cranor, an electrical engineer, came over to help examine the circuit and research the parts we could identify.