Today I’m sharing my top 3D printing projects that are fun, useful, and might just impress someone special. Maybe you’re trying to justify the purchase of a 3D printer to your spouse, or you’re trying to use your 3D printer to help get a girlfriend. Here are my top recommendations for things to print for your significant other.
My favorite printers and filament (affiliate links):
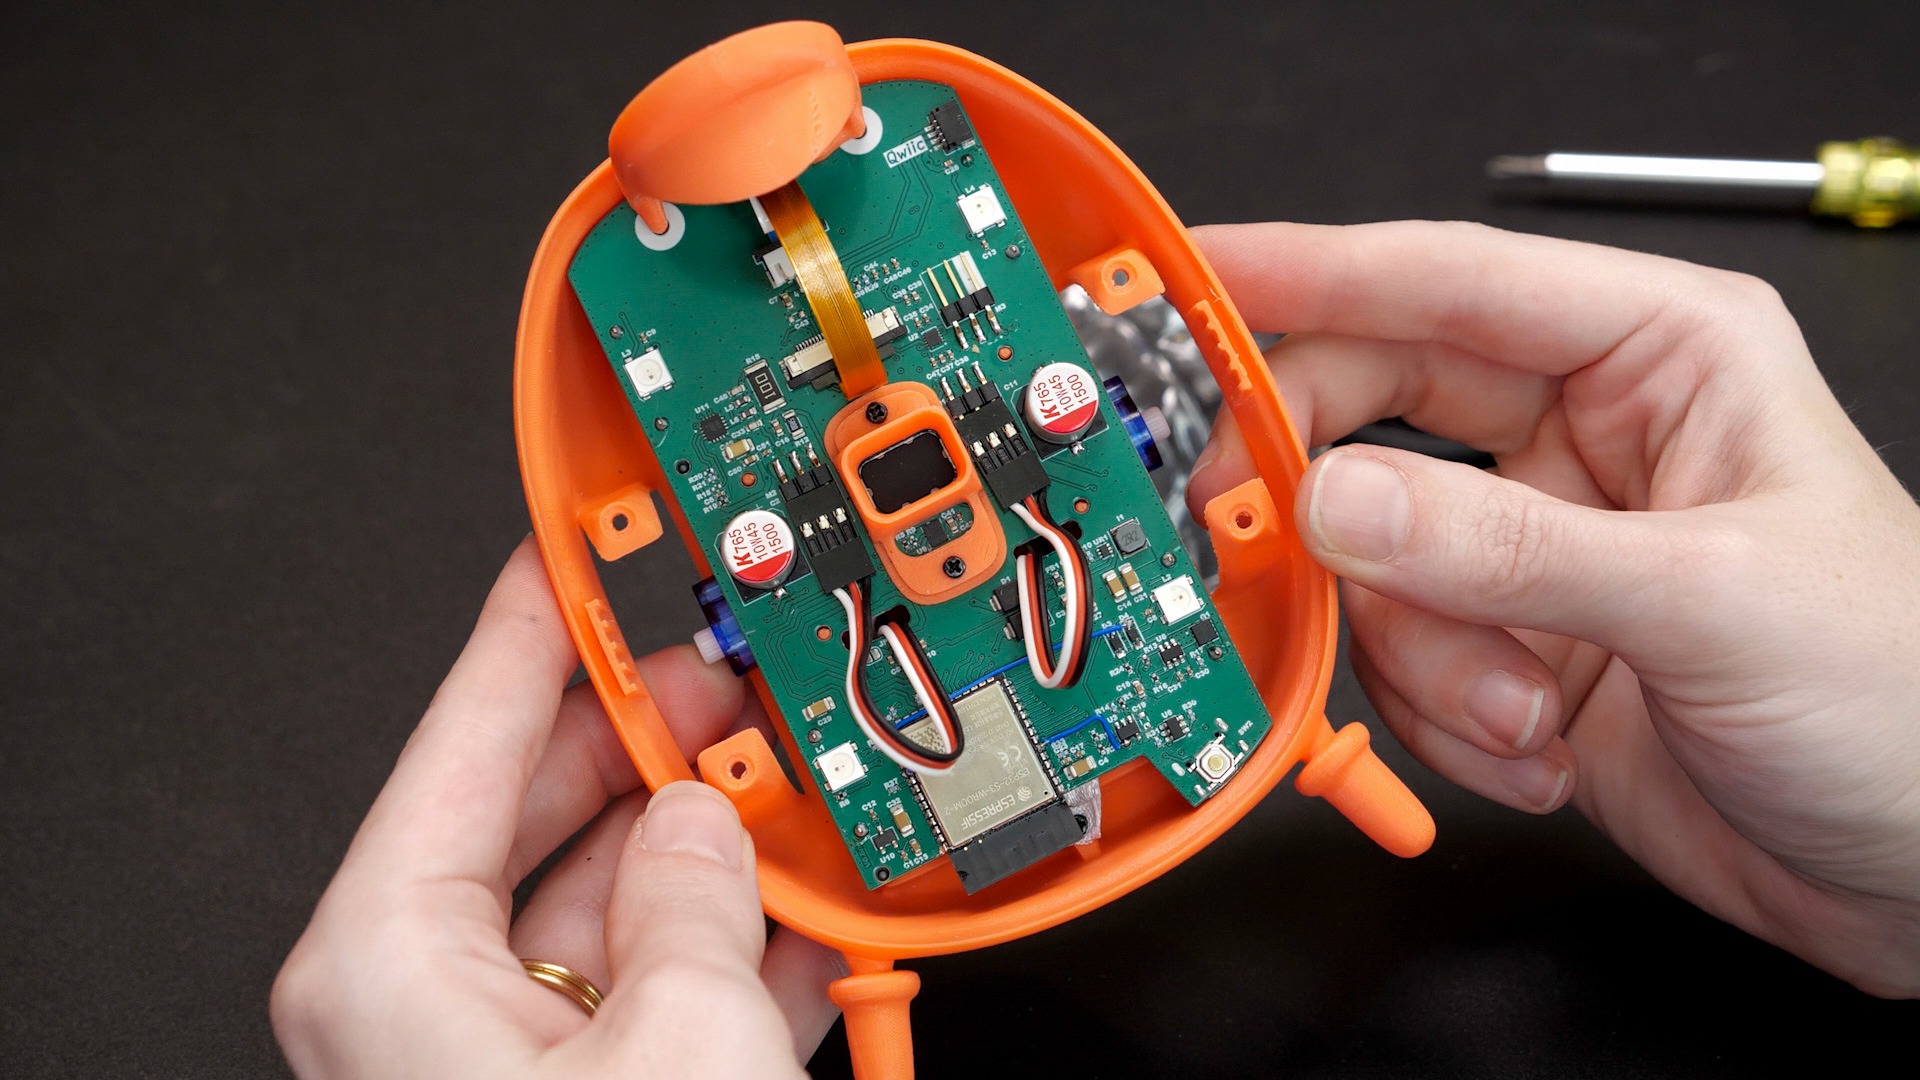
I got my hands on SpikerBot, a new robot from Backyard Brains that teaches neuroscience by letting you wire up spiking neural networks and watch them control a physical machine. It has a slew of sensors and outputs meant to mimic creatures in nature, including a camera that can detect colors and a bunch of different objects.
I sat down with Alex Hatch, the hardware designer who built it. Watch our full discussion in the video above. Key components inside the open-source SpikerBot:
For today’s project, I’ll show you how I used Tinkercad and Alex’s 3D templates for SpikerBot to build a custom accessory– a little plow that redirects the laser distance sensor toward the floor, so the robot can sense the edge of a table and stop itself from driving off.
Today, we’re building a wood slab chandelier that’s way smarter than your average light fixture. This project is a collaboration with James Wright, who approached me with the idea of turning a gorgeous wood slab into a one-of-a-kind ceiling-suspended lighting fixture. We agreed on a concept with LED strip pointing up to spread light across the ceiling, and a few pendants hanging from the slab to provide downward room lighting and also highlight the grain of the slab.
Definitely check out his video to see how he transformed the raw slab into the foundation for our lighting fixture.
In this video, @BeckyStern explores sound generation and musical microcontrollers. Whether you’re building a talking robot or your own DIY synthesizer, this episode will help you choose the right parts for adding audio to your projects.
Today, we’re turning one of the most cursed objects of contemporary e-waste, a disposable vape, into a musical instrument. It’s like an ocarina, using your breath to activate and your fingers to control the pitch.
Taking apart electronics, called a teardown, is a low-pressure way to dip a toe into tinkering without the hangups of building a project from scratch. In this video, @BeckyStern shares safe and useful techniques and answers to common questions about electronics teardowns and e-waste recycling. Disassembling gadgets is a cool way to see all the work that goes into making them, which often involves integrating engineering and design and several interesting manufacturing processes. Becky has disassembled so many gadgets that she’s lost count – and you can watch many of these teardowns over on her channel.
Shenzhen is often described as the fastest city on Earth. In this first episode of Made In Shenzhen, Becky Stern and David Cranor travel from Hong Kong across the land border into Shenzhen, China, to explore Huaqiangbei, the world’s most famous electronics market and a physical interface to the global supply chain.
With the help of local fixer Aqua and PCBWay’s Elaine, Becky digs into what makes Shenzhen different from anywhere else: density, repair culture, and a manufacturing ecosystem where ideas can move from concept to reality with astonishing speed.
How does a sheet of copper-clad fiberglass become a printed circuit board? What goes into making an LED? In this episode of Made In Shenzhen, Becky goes inside a PCB factory to see the complex processes that go into making printed circuit boards, then tours a factory that makes LEDs– 20 million of them a day.
Let’s explore sound-reactive electronics– projects that can sense and respond to sound. In this video, @BeckyStern shares many ways to sense audio, from basic vibration to voice recognition, so that you can pick the right path for your project.
Today, I’ll show you how I built a smart illuminated display case for showing off your finest wares. Specifically, I built this as a YouTube Makers Secret Santa gift for Nate From The Internet. I wanted this year’s gift to balance delight with practicality, so it has two parts: the LED display case with 3D printed logos, and a sturdy fabric knife roll.
The Smart Cabinet
I started with a locking steel and glass key storage cabinet, and customized it by adding NeoPixel LED strip and a 3D printed honeycomb storage wall (HCW), which is a great system of 3D printable parts that lets you swap in whatever hooks or shelves you need. I know Nate loves 3D printing, so while I printed a few generic mounts, I expect he’ll want to customize his to match the items he chooses to display.
The holidays are the perfect excuse to celebrate creativity! Stock up on tools, kits, and projects that inspire more making in the new year. Whether you’re shopping for the electronics tinkerer in your life, the sewist, or a friend who would appreciate a handmade gesture, I’ve rounded up some of my favorite maker-friendly gifts for 2025.
Disclosure: Some links included in this article earn me an affiliate commission, at no extra cost to you.
Table of contents:
Dopp Kit Bag
Canvas Backpack
Ring Holder Necklace
The Inventor’s Workshop by Ruth Amos
A Guide to Making Friends in the Fourth Dimension by Toby Hendy