


This picture of a frog catching fireflies is embellished with lights that bring the bugs to life. Conductive thread is the magic ingredient, bridging the gap between rigid metal and soft floss. To make a stitched scene light up, combine traditional embroidery techniques with a few common electronics components. The possibilities are endless, and the result is an artful conversation piece. This was written as a tutorial for my LED Sewing Kit, where you can include LEDs into an embroidered picture or into a garment of your choice.
Materials and Tools


- Downloadable pattern
- carbon paper
- wooden embroidery hoop
- fabric
- pen/pencil
- scissors
- needlenose pliers
- LED sewing kit
- embroidery floss
- regular sewing thread (any color)
To keep up with what I’m working on, follow me on YouTube, Instagram, Twitter, Pinterest, and subscribe to my newsletter. As an Amazon Associate I earn from qualifying purchases you make using my affiliate links.
Most of these things can be found at the craft store. The battery is a CR2032 coincell (Digikey #P189-ND), and the battery holder has sewable leads (Digikey #BA2032SM-ND).

For the hard-to-find parts, I had put together an LED sewing kit to sell on Etsy. It later became an Adafruit kit that I earned royalties on from 2012-2016 (link to buy).


Modify the LEDs according to the instructions below to make them sewable. I soldered wire leads onto my switch to make it easier to work with. If you’re using the snap from the kit, you’ve got no soldering to do!
Preparation


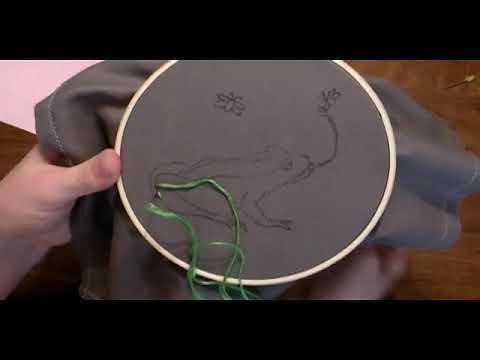
Download the pattern and trace it onto the fabric with the carbon paper.


Loosen the screw and place the solid hoop under the fabric. Secure the outer hoop over the inner hoop, centered over the traced design. Tighten down the screw, and pull the fabric taut, a little bit from each side to keep the design centered. It should make a little noise when you tap on it, like a drum.
Embroider the design


Thread the needle and tie a knot in the end of the floss.


Bring the needle through the fabric from the back to front. Pull taut. We’re going to be doing the backstitch along the lines of the pattern.


Bring the needle to the back from the front, following the traced line and pull taut.

Here’s where we start the backstitch. Bring the needle from the back to front one stitch’s length up the line from the first stitch and pull taut.

Pull the needle from front to back at the spot where the first stitch ended and pull taut.

Repeat the second stitch: come from back to front one stitch down the line.


Keep going. You can jump over sections of the back to start up another line, just make sure the fabric is tight in the hoop to prevent puckering. Also try to make the most efficient path to use the smallest amount of floss required.


When you run out of floss, Just tuck in the end, weaving it in between previous stitches on the back side. Cut the floss.

Finish the rest of the design according to the pattern.
Prepare the LED and switch


Now we’re going to prepare the LEDs so they’re sewable. Bend the longer lead in a square fashion, coiling it towards the cap.

Coil the shorter lead in a round fashion up towards the cap. Repeat the process on the other LED.

Prepare the switch by coiling the leads of the wires on the switch. It’s not important which one is which. If you’re using the LED sewing kit, you have a snap instead of a switch. Good news, you can skip this step!
Sew the circuit

Hold the LED in place with one hand. Thead the needle with conductive thread. Bring the needle through from the back on the outside of the square coil.

Bring the needle from front to back inside the square coil, stitching over the metal lead.

Continue to make stitches all around the square coil. This makes a strong mechanical and electrical connection.

This is what the back looks like. We’re going to sew a line to the positive battery connection.

Backstitch a line down to the positive battery connector following the pattern.

Hold the battery holder in place with one hand, and sew it in place with the other. Notice we’re sewing the end with the + on it (not the -). Stitch it the same way as the LED. You’ll reach a point when the needle will no longer fit through the hole because it will be too ful of stitches.

Without cutting the thread, stitch a path (still in backstitch) to the other firefly, and sew the square-coiled lead the same way you did the first.

Tie off the thread. Weave it back along the stitched line the same way you do with the regular floss, then cut it. The reason you weave it back is that the end tends to fray, which could cause a short circuit if it were near another conductive trace.

Here’s what it looks like on the front.

Start sewing the negative leads of the LEDs together.

Sew a path to the other negative LED lead, around the positive trace and tack it down. Be sure not to catch the thread on the postive lead anywhere.

Remove the nuts on the switch post.


Align the two holes in in the embroidery hoop with the design centered and oriented with the fastening screw up. A little wiggling may be required. Tighten down the fastening screw.

Poke a hole in the fabric with scissors (or an awl or seamripper if you’ve got ’em).

Thread the switch into place.


If the post sticks out the other side of the hoop, you can thread on one of the nuts that came with the switch.

Sew one lead of the switch to the negative conductive path (the one not attached to the battery), making sure to make good connections between the switch coil and the negative conductive path. Cut the thread. If you’re using the snap from the kit instead of a toggle switch, sew one half to the back of the embroidery with the conductive thread as indicated in the diagram, then sew the second conductive path to the other half of the snap (but not the base fabric) so that it dangles free (use careful positioning so it doesn’t short your circuit while its dangling). Snap the snap to turn on the circuit.

Bend the other switch lead toward the unsewn battery connector and sew it down using the same technique as the LEDs.

Sew a line to the negative battery connector terminal and sew through the hole in the connector. Cut the thread.
Finish up

Check your circuit against the diagram and watch out for fraying thread shorts. Set the switch to the “off” position.

It goes in at an angle, then push it down. The + side goes up (the side with the writing). Push down the battery to make sure it’s flush and completely in.

Turn it over and flip the switch. The lights should come on! If they don’t, turn it off and check for good connections and shorts.

Trim the fabric within 1.5 inches of the edge.

Use regular thread and a running stitch to gather the edge on the back side.

Here’s the back. You can change the battery when it dies. If you leave it on 24/7, it should last 1-2 weeks, gradually getting dimmer as time goes on.

Here’s what it looks like off.

Here’s what it looks like on. That’s it, you’re done!
Inspiration and workshop links:
- Hannah Perner-Wilson’s soft circuits: www.kobakant.at/DIY/
- LilyPad Arduino and accessories: Sparkfun Electronics
- Conductive thread: Lame Lifesaver
- Conductive fabrics and Velcro: Less EMF
Also published on CRAFT/MAKE and Instructables
- CRAFT Video
- Download Pattern
- tutorial on Make: Projects
- tutorial on Instructables
If you like this project, try these others!