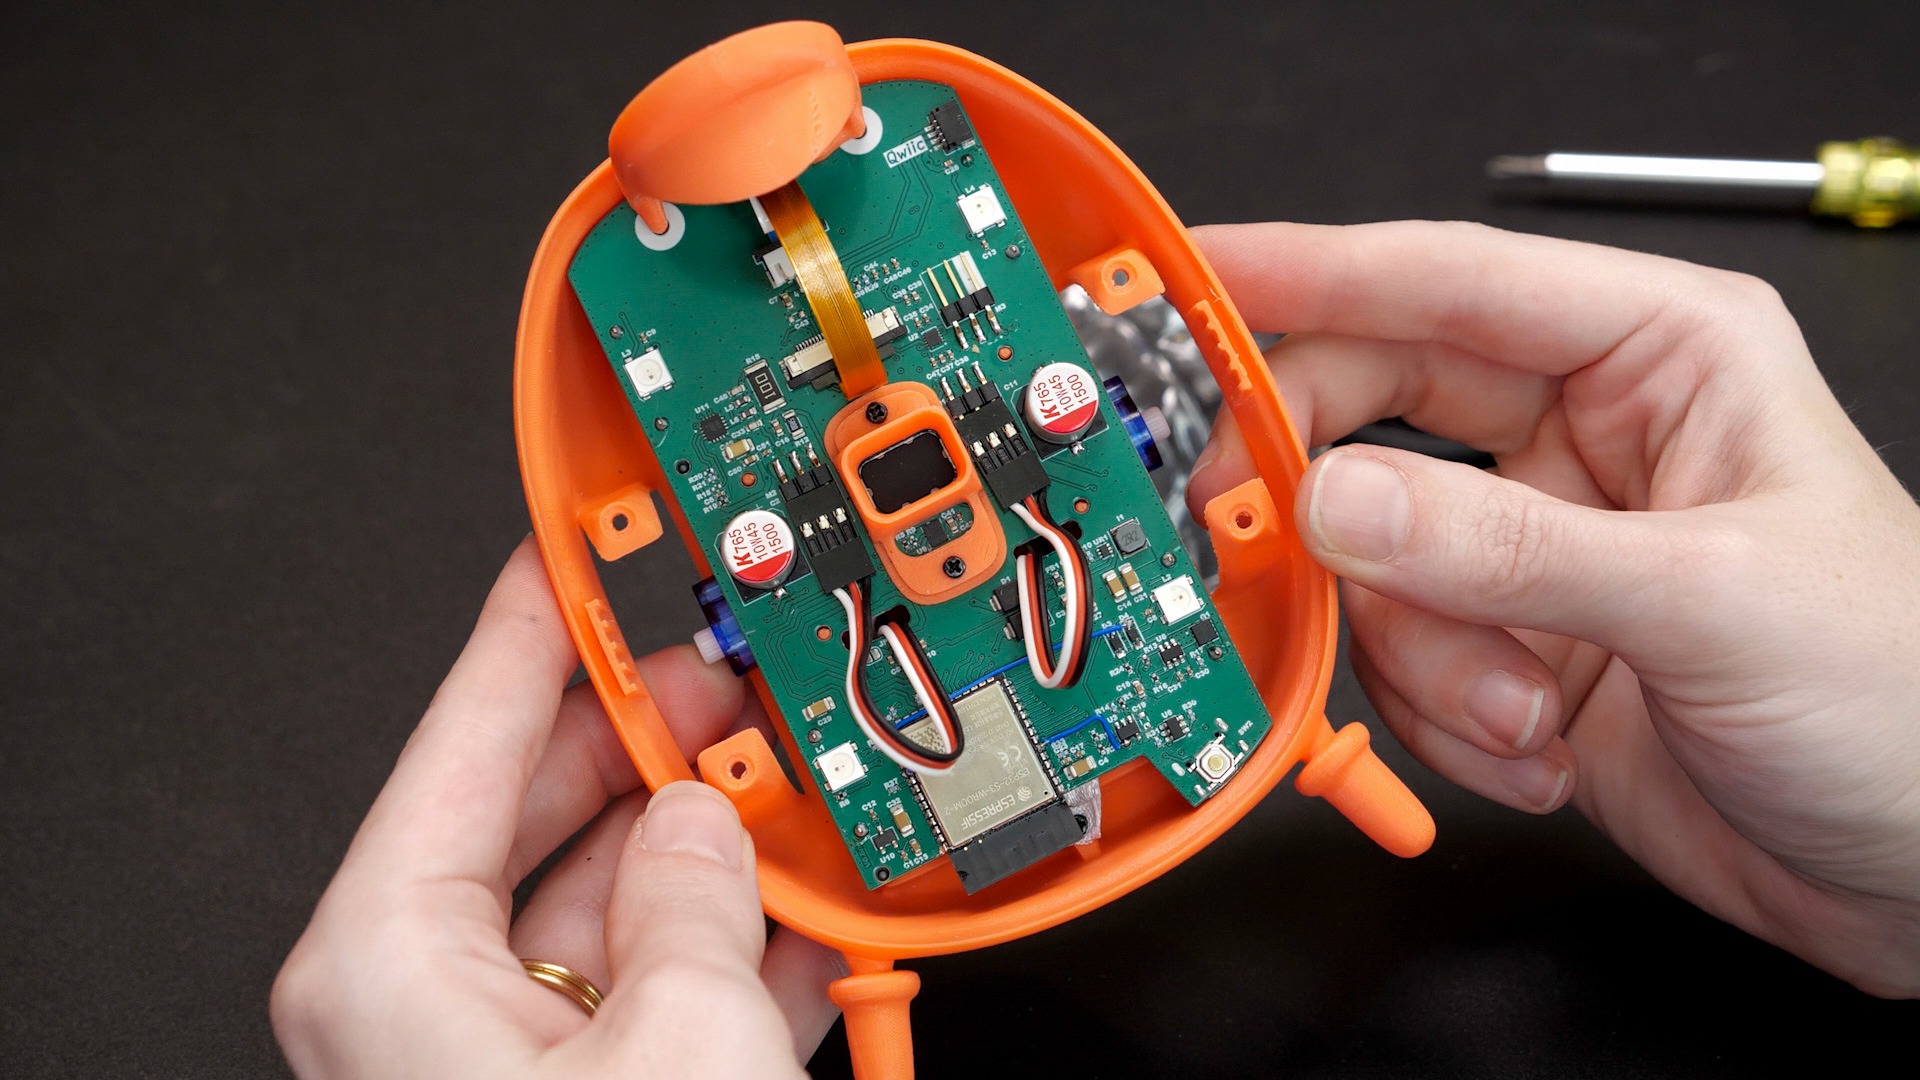
I got my hands on SpikerBot, a new robot from Backyard Brains that teaches neuroscience by letting you wire up spiking neural networks and watch them control a physical machine. It has a slew of sensors and outputs meant to mimic creatures in nature, including a camera that can detect colors and a bunch of different objects.
I sat down with Alex Hatch, the hardware designer who built it. Watch our full discussion in the video above. Key components inside the open-source SpikerBot:
For today’s project, I’ll show you how I used Tinkercad and Alex’s 3D templates for SpikerBot to build a custom accessory– a little plow that redirects the laser distance sensor toward the floor, so the robot can sense the edge of a table and stop itself from driving off.
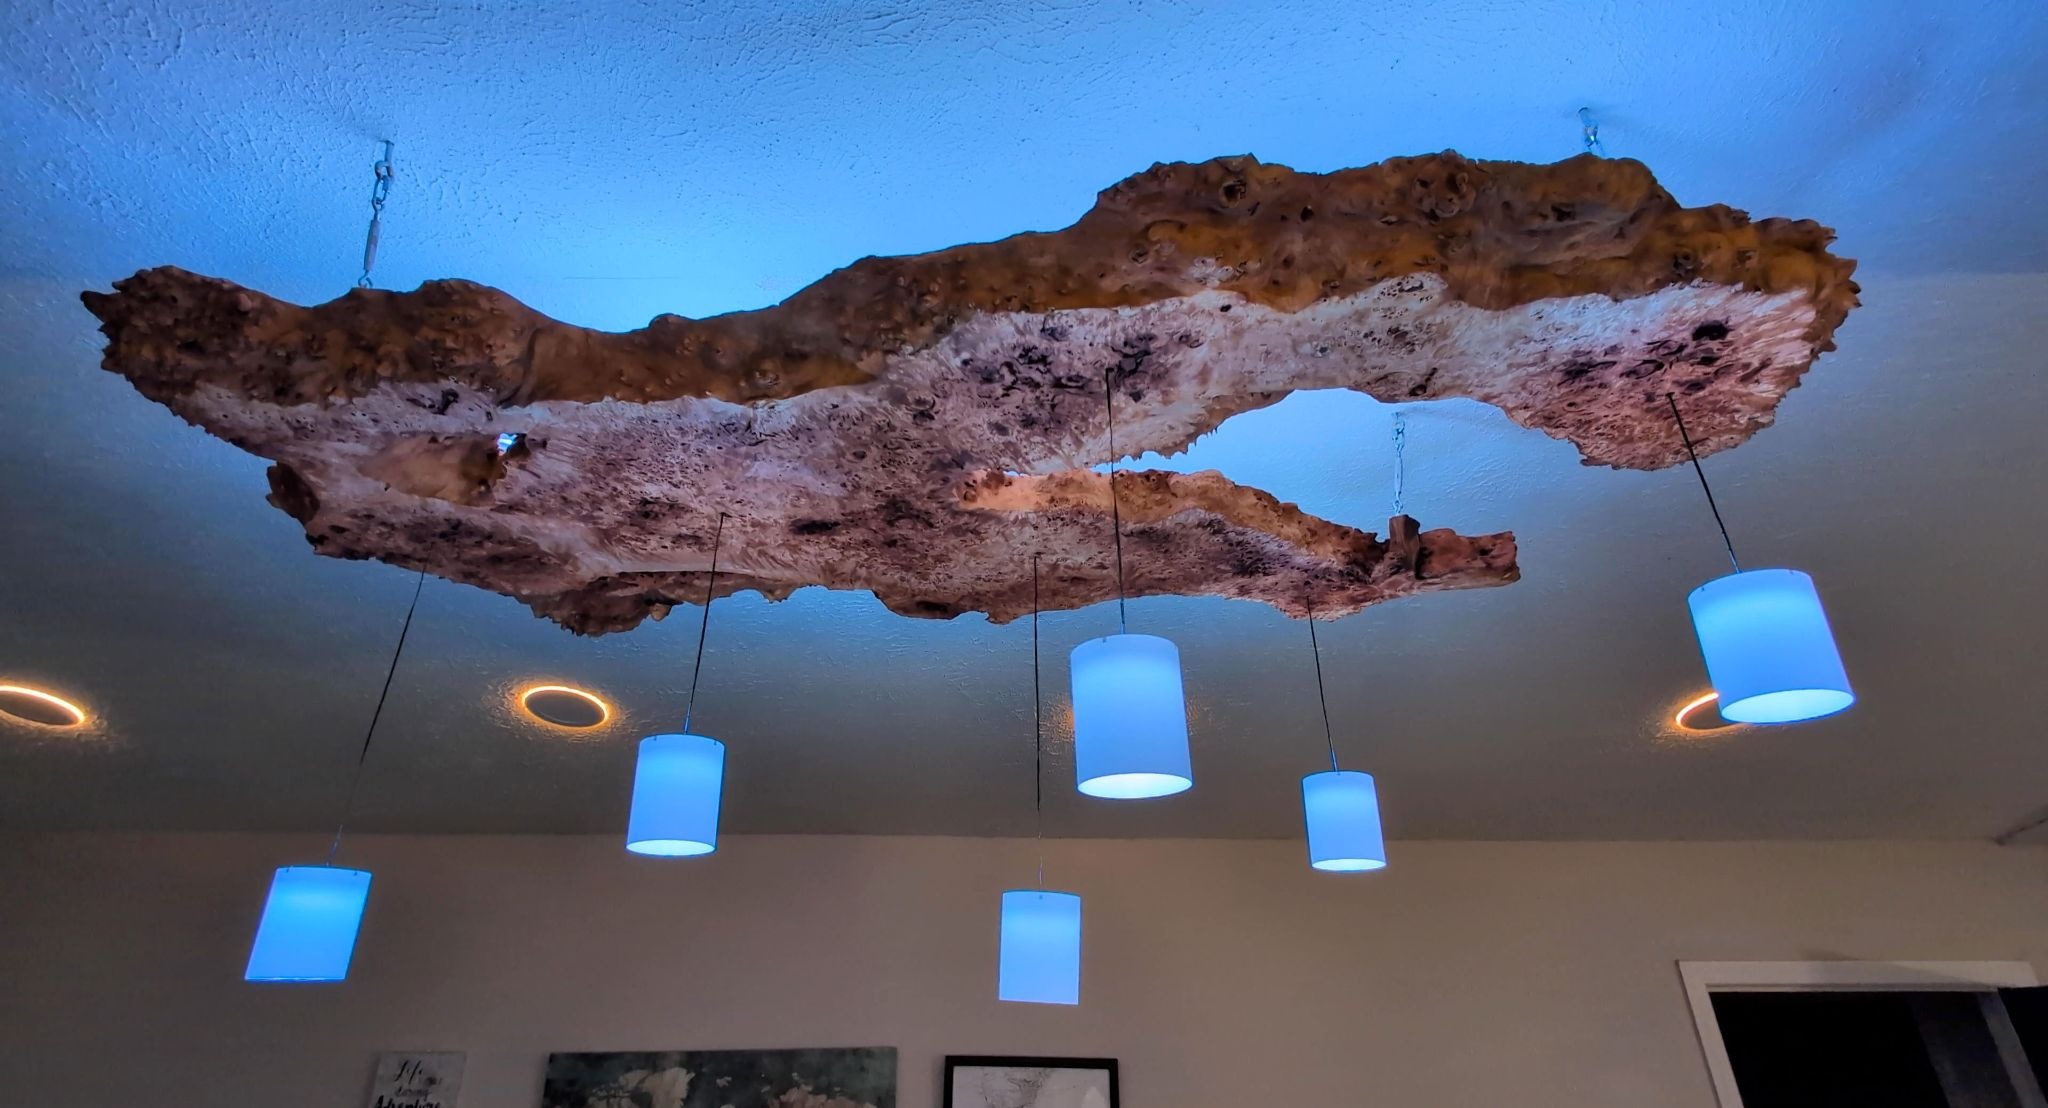
Today, we’re building a wood slab chandelier that’s way smarter than your average light fixture. This project is a collaboration with James Wright, who approached me with the idea of turning a gorgeous wood slab into a one-of-a-kind ceiling-suspended lighting fixture. We agreed on a concept with LED strip pointing up to spread light across the ceiling, and a few pendants hanging from the slab to provide downward room lighting and also highlight the grain of the slab.
Definitely check out his video to see how he transformed the raw slab into the foundation for our lighting fixture.
Today I’m sharing a super fun project that I collaborated on with a bartender friend of mine. He asked me to make a set of illuminated mushroom drink menus inspired by Alice in Wonderland. The idea is that he presents a mushroom, and when the recipient lifts the cap, text is revealed, letting them know which drink they are about to get. I modified Wuguigui’s free mushroom desk lamp files and added a battery-powered LED circuit to create this easy glowing 3D printing project.
The mushroom lamp design on Printables had to be modified because it uses an incandescent light fixture, but it’s such a lovely design that I chose to build on top of it rather than recreate something similar. The white dots are printed separately from the top dome, and the two main pieces screw together with their integrated threads.
Today we’re building a mini television for cats. My cat Benchley loves watching TV. It’s really a mini computer, since I’m using a Raspberry Pi to play YouTube on a little HDMI screen. Let’s get started.
Thanks to DigiKey for supplying the materials for this project! Their boxes make great cat beds.
Storing filament properly is important for the quality of your prints. It will absorb moisture from the air, which will sizzle and pop as it passes through your printer’s hot end, causing blobs, under extrusion, and other defects.
Back in 2017, I showed you how to make a filament dry box, and while that’s a great project, a lot has changed since then and I want to update you on my current filament storage methods, and share some of my favorite things to print along the way.
The simplest and cheapest way to store filament spools is in plastic bags with a packet of silica gel. New spools come this way, but only some manufacturers use ziptop bags that you can reuse. Gallon freezer bags will do the trick, but the chonkier spools will be a tight fit, so to make them keep their seal for as long as possible, tape up the edges of the zipper.
It’s roundup time! If you’re a longtime fan, you might remember some of these 3D printing projects from my channel. If you’re new, consider this a guided tour of some of my best.
1. Dust Port Adapter
Let’s start with a project that will come in handy if you have power tools with a different brand dust collector: a dust port adapter! These are great for keeping all that excess sawdust from getting everywhere. It’s extremely useful, prints super fast, and hardly uses any filament.
You can check out my full video on that project here.
2. LED Mason Jar Lanterns
These LED mason jars are kinda magical. When lit up, these little jars transform into warm and inviting orbs. The 3D print holds the circuit in place and you can customize them in a bunch of different ways.
Now, let’s try something totally different. This next project is a candle mold that you can 3D print. It’s perfect for making candles in any shape you want. This method works surprisingly well, and custom candles make great gifts.
Once you’ve been 3D printing for a while, you will inevitably acquire a stash of filament, and you may want to start looking into filament storage solutions. Well, take this as a sign to build your own 3D printer filament dry box. This customized storage bin will keep your filament from getting damp and ruining your prints. The off-the-shelf components work with some 3D-printed parts to bring this project together quickly.
Next, make this glowing LED flower. The stem shape holds a battery and the 10mm LED supports the flower’s petals. You can optionally use needle felting to change up the texture as well as diffuse the LED.
And last but not least, here’s an awesome LED kaleidoscope made from 3D printed parts. To get started, download the files my friend Debra designed and watch our video to learn how to put it all together using wireless LEDs.
So there you have it – my top six easy DIY 3D printing projects. I hope you have as much fun making these projects as I did. Thanks for watching and happy 3D printing!
Today we’re building an LED kaleidoscope. This 3D-printed project comes together with no glue or fasteners and contains wireless LEDs to create fun patterns. The inductive power coil lives in the base.
I didn’t design this kaleidoscope – My friend Debra Ansell from Geek Mom Projects did. You can check out her tutorial to see more information about this project, access the files to make your own, or browse Debra’s other projects. You can also follow her on social media @geekmomprojects.
This year I pulled This Old Tony‘s name for Makers Secret Santa. I was inspired by Tony’s love of benders and bending, and built him a toy from my childhood in the shape of a letter T. It’s got a magnetic spinning device that rides along the wire, and these little bends provide a turnaround point so you can, with practice, get the spinner to move continuously along the track.