
My Bullet Journal
I made a complete writeup about my bullet journal on Instructables.
Favorite supplies:
I made a complete writeup about my bullet journal on Instructables.
Favorite supplies:
These wire wrapped and beaded earrings are a great first project to make with wire. You’ll learn to manipulate wire with your hands and pliers, shape wire with a hammer and bench block, and open and close jump rings to attach your creations to ear wires. This project is an excerpt from my free Instructables Jewelry class, so if you like it, be sure to check out the other new skills you can learn!


For this project, you will need:
To keep up with what I’m working on, follow me on YouTube, Instagram, Twitter, Pinterest, and subscribe to my newsletter. As an Amazon Associate I earn from qualifying purchases you make using my affiliate links.
(more…)

I created this sign for the DJ booth at the 8th annual Interactive Show at my local hackerspace, NYC Resistor. The theme this year was The Running Man, the chintzy 1987 sci-fi movie, which takes place in the year 2017. The sign is built from foam core board and the pixel strip inside is diffused with plain printer paper. The sign’s colors and animations can be controlled with a phone/tablet app over bluetooth.
This guide details the construction, programming, and use of this simple sign using Arduino and the Adafruit Feather Bluefruit 32u4 microcontroller and its companion Bluefruit LE Connect app for iOS/Android. You could easily scale back the wireless control aspect and use an Arduino Uno and a physical switch to change the animation, as in my free introductory Arduino Class, or control the sign from the internet by switching the microcontroller for a wifi board like the Feather Huzzah ESP8266, which you can learn to do in my free Internet of Things Class.
To keep up with what I’m working on, follow me on YouTube, Instagram, Twitter, Pinterest, and subscribe to my newsletter. As an Amazon Associate I earn from qualifying purchases you make using my affiliate links.
(more…)
This project is about creating a new seat for my motorcycle, a 1975 Honda CB200T.
I picked up a trashed old seat on eBay because my current seat is in good condition, and there’s no sense in tearing apart a perfectly good seat. Plus then I wouldn’t be making my bike inoperable while working on this project.
The main reason I wanted to change my seat is to lower standover height since I’m extra short. I also welcomed the opportunity to customize any aspect of my bike, since I am a motorcycle beginner.
To make this project, I used the following materials:
and the following tools:
To keep up with what I’m working on, follow me on YouTube, Instagram, Twitter, Pinterest, and subscribe to my newsletter. As an Amazon Associate I earn from qualifying purchases you make using my affiliate links.
(more…)Every morning when I get ready to walk the dog, I want to know what the weather is like outside. Is it raining? Cold enough for the dog’s sweater? From my current NYC apartment, it’s even hard to tell if I’ll need sunglasses when I step outside. I usually use my phone for checking the weather, but wouldn’t it be nice to have some wall decor that provides this info at a glance?


I built this IoT weather display using a small shadow box, some RGBW NeoPixel LEDs, and an Adafruit Feather Huzzah ESP8266 with seven-segment display FeatherWing. Weather data is tracked using IFTTT, an incredibly rich (and free ) API gateway, which sends data to the cloud service Adafruit IO, which is then accessed by the Arduino program running on the microcontroller.
Before attempting this project, you should be familiar with Arduino, and you can take my free Arduino Class, or Randy’s LEDs & Lighting Class or Electronics Class if you need to brush up on any of the basic skills.
For this project, you will need:
To keep up with what I’m working on, follow me on YouTube, Instagram, Twitter, Pinterest, and subscribe to my newsletter. As an Amazon Associate I earn from qualifying purchases you make using my affiliate links.
As an alternative to the Feather Huzzah, you can also use the NodeMCU board (USB programmable) or Huzzah ESP8266 breakout, for which an FTDI cable is required to upload new programs (use the standard 7-segment backpack rather than the FeatherWing version).
(more…)Send your valentine a note through the net! This DIY electronics project uses a small vibrating motor to gently wave a tissue paper heart and flash an LED when it receives instructions over the internet from another device. I built two versions of the ESP8266 wifi circuit, also equipped with two buttons for triggering the two commands. The devices talk over the Adafruit IO cloud data service to communicate with each other from anywhere with wifi, and I’ll show you how to activate your valentine with the API gateway service IFTTT as well, in case you only want to build one valentine circuit.
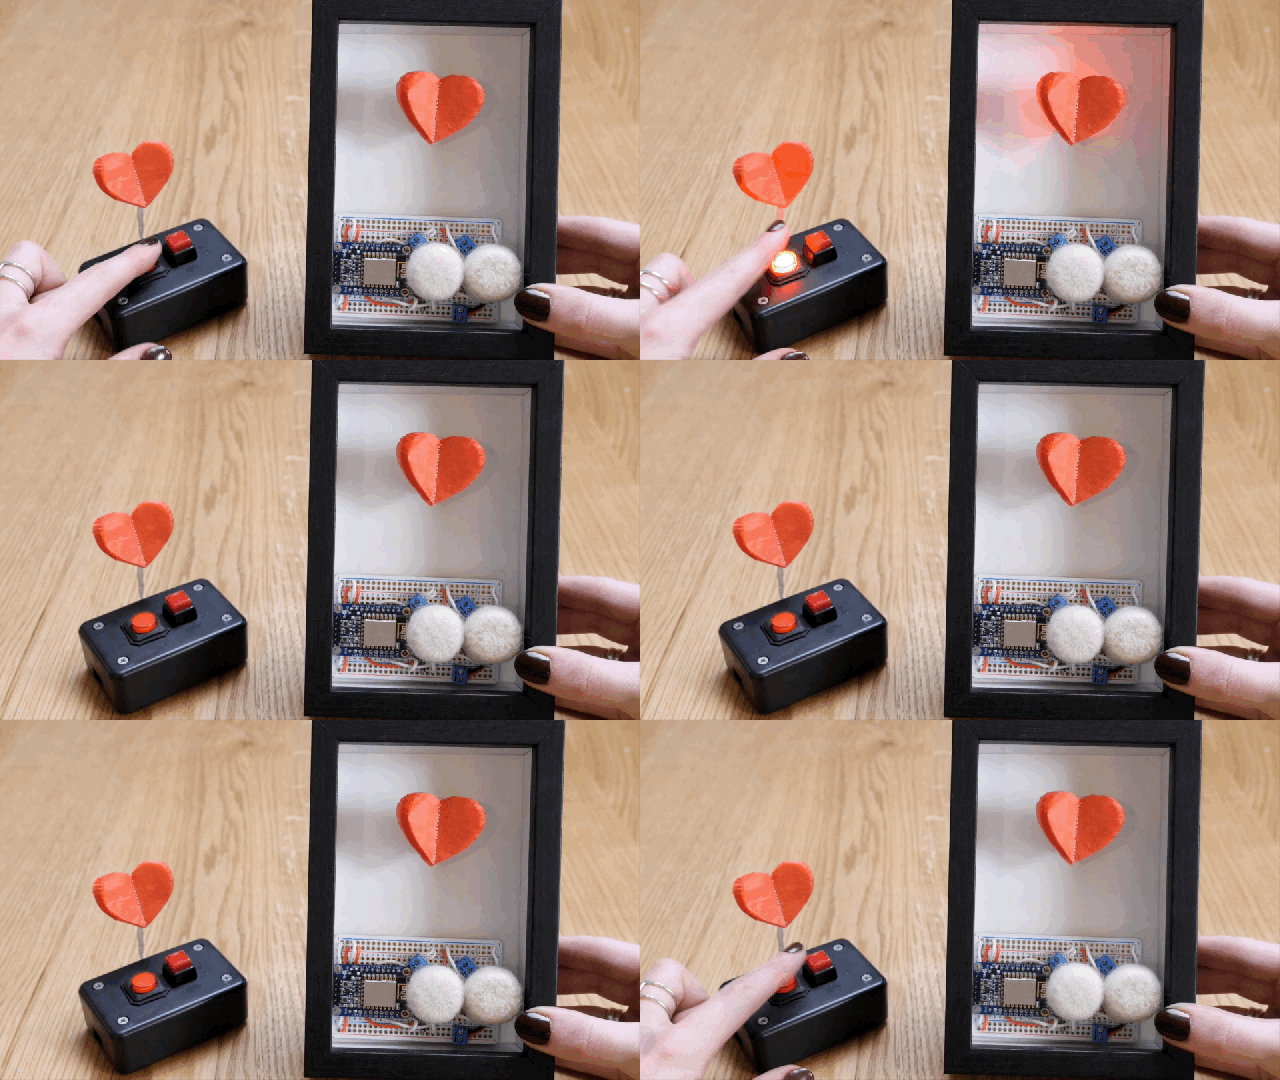
This is a pretty easy Internet of Things project! Before you dive in, you should have a workable knowledge of the Arduino software and electronics soldering. Try my beginner Arduino Class and/or Randy Sarafan’s basic Electronics Class to get up to speed!


For this project I created two devices that communicate with one another, but this project works fine with just one device, triggered over the internet with your phone or computer (we’ll cover that later). Regardless of the number of transceivers you’re making, I highly recommend creating one solderless breadboard prototype and duplicating it with a new set of parts in soldered form, rather than disassembling the working prototype. It makes building and troubleshooting the final board much easier.
For each device:
Gather the following tools:
Create/log in to accounts on the following sites:
(more…)Over 15 years ago I made a silver ring with a bezel-set amber stone in a jewelry making class, and I’ve been wearing it ever since. In this project, I’ll walk you through my process for recreating this ring (a newer, nicer version of the original).
For this project, you will need:
To keep up with what I’m working on, follow me on YouTube, Instagram, Twitter, Pinterest, and subscribe to my newsletter.


This is my beginner’s introduction to Arduino! I’m super proud of this class and hope you enjoy following along as much as I enjoyed writing it.
More details in the Instructable